Tutorial: Godot, from a sample project to a phone-ready web build
Preview tools Godot 4.7.2 About 30 minutes
You will take the official Godot third-person shooter demo, export it for the browser, add on-screen touch controls for phones, run it locally with an FPS overlay and the profiler, and set up CI. This is exactly what we did to the sample repository, in the order we did it, including the things that went wrong.
Sample repository: vapour-computer/tutorial-godot-tps,
branch vapour-tutorial. It is a fork of godotengine/tps-demo (MIT).
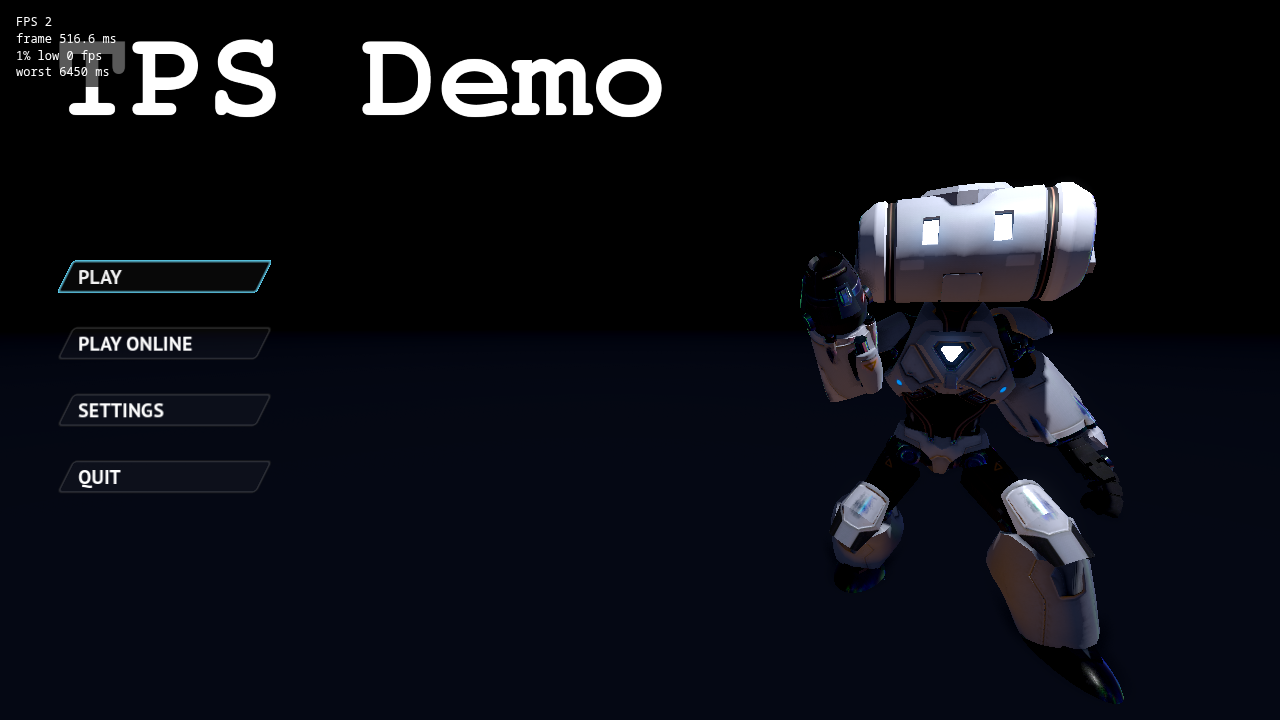
The finished build, served by vapour test and captured in headless Chromium. The overlay in the corner is added
only while testing locally. This capture used software rendering with no GPU, so the FPS reads 2; on real hardware
it is far higher. The overlay measures what the browser really does.
What is verified, and what is not
| Step | State |
|---|---|
| Web export builds with Godot 4.7.2 | Verified locally, and on GitHub Actions (the vapour-check workflow passes) |
vapour test serves it with the FPS overlay |
Verified |
| Profiler attaches and records CPU and memory | Verified (screenshot below) |
vapour publish --dry-run packs it |
Verified: 255.1 MiB, under the 512 MiB limit |
| Touch controls validate and preview | Verified with vapour controller check and preview |
| Touch controls working on a real phone | Not verified. The player-side overlay is a preview feature we did not test on a device |
| Publishing to Vapour | Not run. It needs your token and a released vapour-ci (see status) |
1. Get the project
git clone https://github.com/vapour-computer/tutorial-godot-tps.git
cd tutorial-godot-tps
git checkout vapour-tutorial
To follow along from scratch instead, fork godotengine/tps-demo and make a vapour-tutorial branch. The upstream
project is about 1.3 GB with its history, and the web export is about 600 MB.
Open it in Godot. Our added files, export_presets.cfg, VAPOUR.md and vapour.toml, sit in the file list:
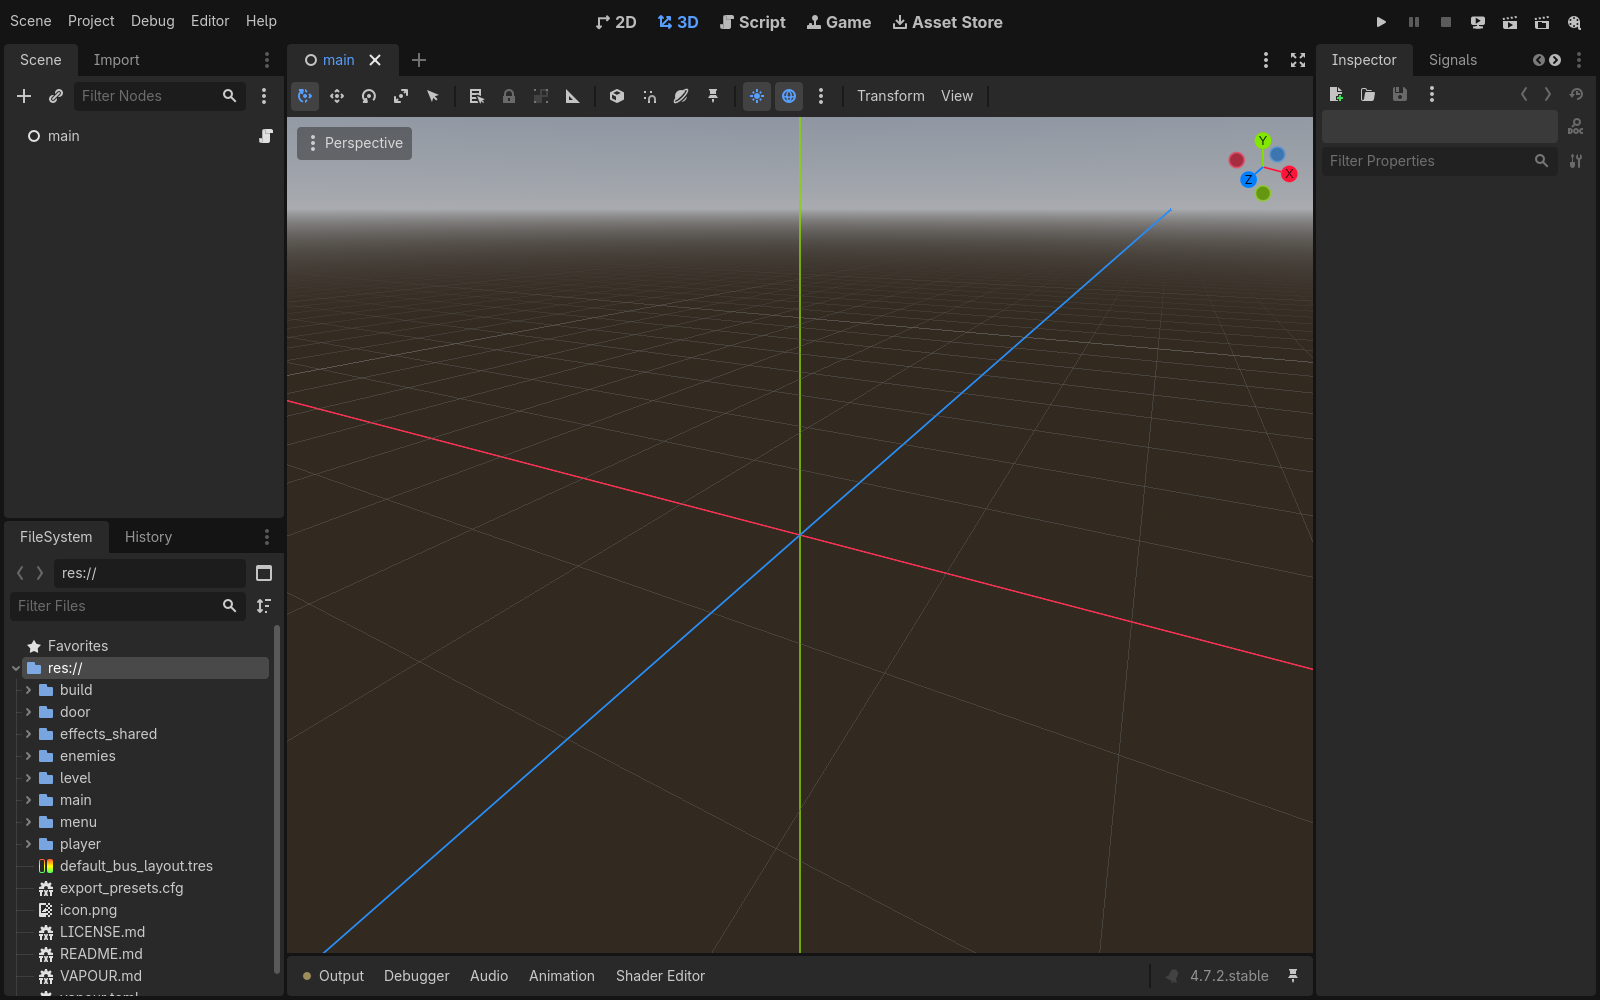
You need Godot 4.7.2 and its Web export templates (Editor → Manage Export Templates). The editor and the templates must be the same version.
2. Add a Web export preset
Godot only exports what a preset describes. Open Project → Export…, choose Add… → Web, and keep the name
Web.
Open Project → Export… in the editor:
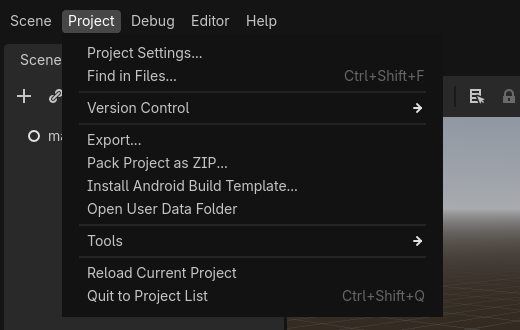
Then the export window. Here is the finished Web preset, with Thread Support off:
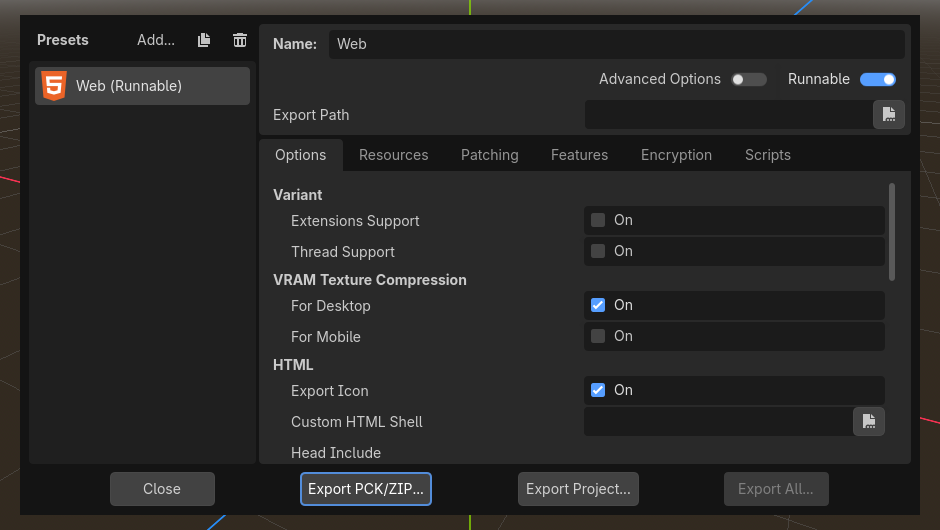
The real export window for the sample game.
We saved the preset as export_presets.cfg. These are the entries that matter:
| Setting in the Export dialog | Value |
|---|---|
| Preset name | Web |
| Platform | Web |
| Export filter | All Resources |
| Thread Support | off |
| Extensions Support | off |
| VRAM Texture Compression | For Desktop on, For Mobile off |
| Progressive Web App | off |
- Thread support is off. Threaded Godot builds need cross-origin isolation headers.
vapour testsends them, but keep the first build simple. - The preset must be named
Weband have platformWeb.vapour buildrefuses anything else.
A trap we hit: upstream's
.gitignorelistsexport_presets.cfg, so the file silently never reached Git. CI then failed to find the preset. We removed that line and committed the file.
Export it from the command line. This is also what CI runs:
mkdir -p build/web
godot --headless --path . --import
godot --headless --path . --export-release "Web" build/web/index.html
build/web/
├── index.html
├── index.js            (280 KB)
├── index.wasm          (40 MB)
├── index.pck           (597 MB)   ← the game's data
└── …icons and audio worklets
3. Give the touch controls something to press
This is the part that needs a little thought. The on-screen controller (see [controller])
works by sending keyboard keys. It can only drive actions that have a key.
We listed the TPS demo's input actions in project.godot and checked what each is bound to:
| Action | Keyboard | Mouse | Gamepad |
|---|---|---|---|
move_left move_right move_forward move_back |
A D W S and arrows | left stick | |
jump |
Space | button 0 | |
shoot |
none | left button | right trigger |
aim |
none | right button | left trigger |
view_left view_right view_up view_down |
none | mouse movement | right stick |
Movement and jump are fine. Shoot, aim and look have no keyboard key, so a touch screen could not reach them. We fixed that in the Input Map by giving each a key:
| Action | New key |
|---|---|
shoot |
F |
aim |
Q |
view_left / view_right |
J / L |
view_up / view_down |
I / K |
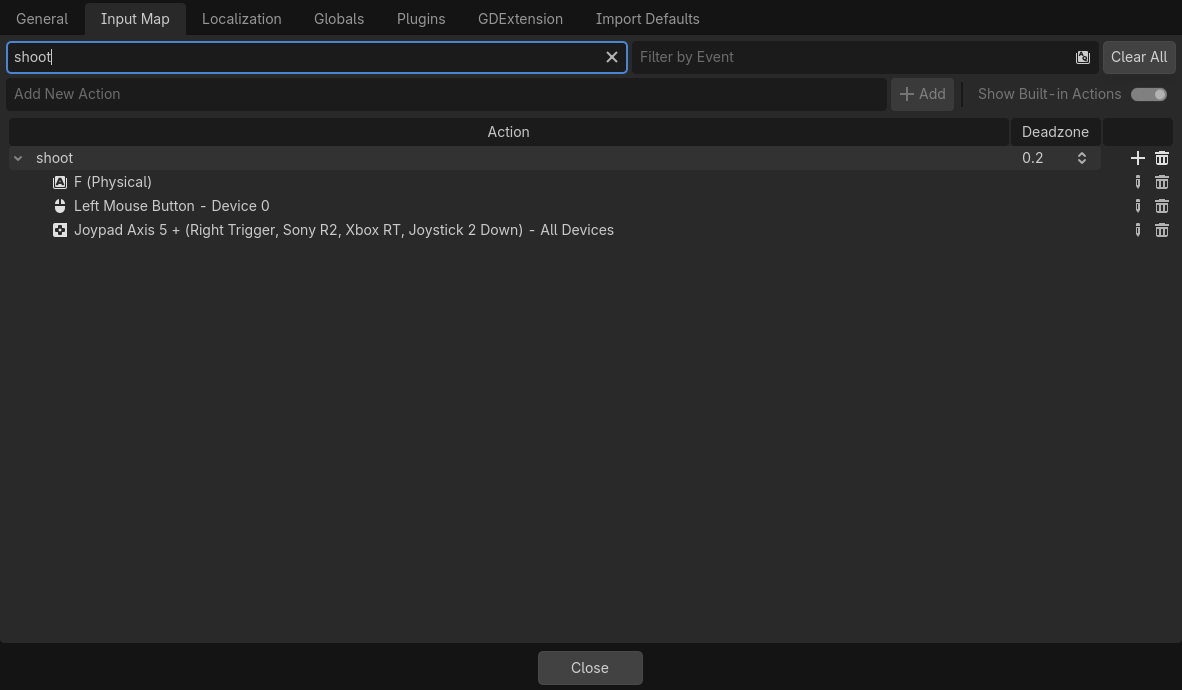
Project → Project Settings → Input Map, filtered to shoot. The F key is the one we added. The mouse and gamepad inputs were already there.
In the Input Map editor, click + next to each action, choose Key, and press the key. The mouse and gamepad bindings stay, so
desktop play is unchanged. Godot writes the result into project.godot. GitHub's comparison of our branch with upstream shows the whole
change at a glance: two commits, seven files.
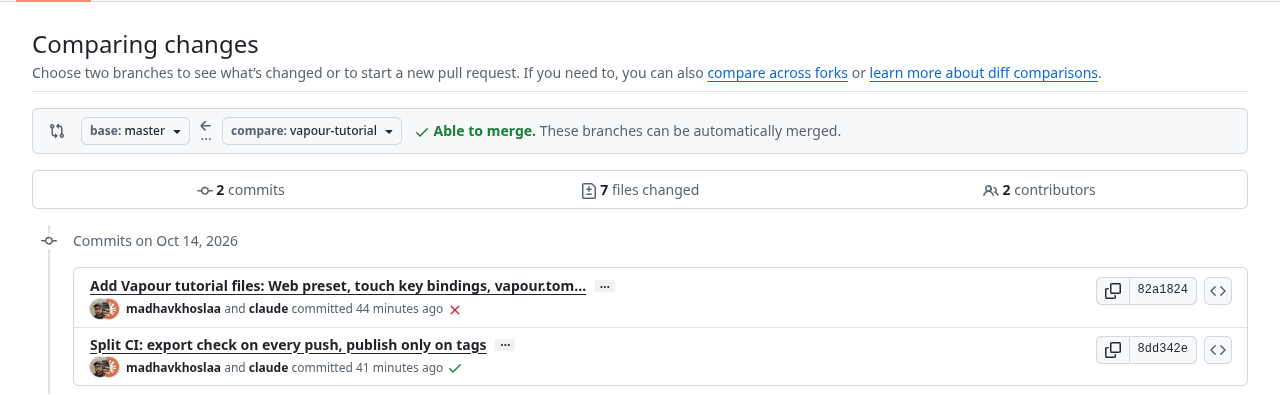
GitHub's comparison of vapour-tutorial with upstream master. The red cross on the first commit is the run that failed
because vapour-ci@v1 does not exist yet, described in CI. The second commit's green tick is the fix.
4. Describe the controls in vapour.toml
Now map the on-screen controls onto those keys. We used two sticks and three buttons:
| Control | Type | Sends |
|---|---|---|
move (left stick) |
joystick | w a s d |
look (right stick) |
joystick | i j k l |
jump |
button | Space |
shoot |
button | f |
aim |
button | q |
[project]
title = "TPS Demo"
slug = "tutorial-godot-tps"
engine = "godot"
platform = "desktop"
version = "0.1.0"

[build]
dir = "build/web"

[controller]
mode = "keyboard-map"

[[controller.controls]]
id = "move"
type = "joystick"
x = 0.20          # centre, as a fraction of the screen; y grows downward
y = 0.74
w = 0.30
h = 0.30
up = "w"
down = "s"
left = "a"
right = "d"
deadzone = 0.18
sensitivity = 1.0
repeat_hz = 60

[[controller.controls]]
id = "look"
type = "joystick"
x = 0.80
y = 0.74
w = 0.30
h = 0.30
up = "i"
down = "k"
left = "j"
right = "l"
deadzone = 0.12
sensitivity = 1.25   # look needs to be a bit more sensitive than move
repeat_hz = 90

[[controller.controls]]
id = "jump"
type = "button"
x = 0.58
y = 0.48
w = 0.13
h = 0.13
key = "Space"

[[controller.controls]]
id = "shoot"
type = "button"
x = 0.88
y = 0.46
w = 0.13
h = 0.13
key = "f"

[[controller.controls]]
id = "aim"
type = "button"
x = 0.74
y = 0.30
w = 0.11
h = 0.11
key = "q"
Every entry is explained in the vapour.toml reference.
Check it, then look at it:
$ vapour controller check
Controller mode: keyboard-map
  move         joystick at (0.20, 0.74) size (0.30, 0.30)
    joystick tuning: deadzone=0.18 sensitivity=1.00 repeat_hz=60
  look         joystick at (0.80, 0.74) size (0.30, 0.30)
    joystick tuning: deadzone=0.12 sensitivity=1.25 repeat_hz=90
  jump         button   at (0.58, 0.48) size (0.13, 0.13)
  shoot        button   at (0.88, 0.46) size (0.13, 0.13)
  aim          button   at (0.74, 0.30) size (0.11, 0.11)
Controller config looks good.
Tip: run `vapour controller preview` to see the layout.
$ vapour controller preview
Preview (D=dpad, J=joystick, B=button)
············································
············································
············································
············································
············································
·····························BBBBBB·········
·····························B····B·········
·····························BBBBBB·········
······················BBBBBBB······BBBBBBB··
······················B·····B······B·····B··
······················BBBBBBB······BBBBBBB··
··JJJJJJJJJJJJJJ············JJJJJJJJJJJJJJ··
··J············J············J············J··
··J············J············J············J··
··J············J············J············J··
··J············J············J············J··
··J············J············J············J··
··JJJJJJJJJJJJJJ············JJJJJJJJJJJJJJ··
············································
············································
vapour controller preview --html writes a page you can open in a browser:
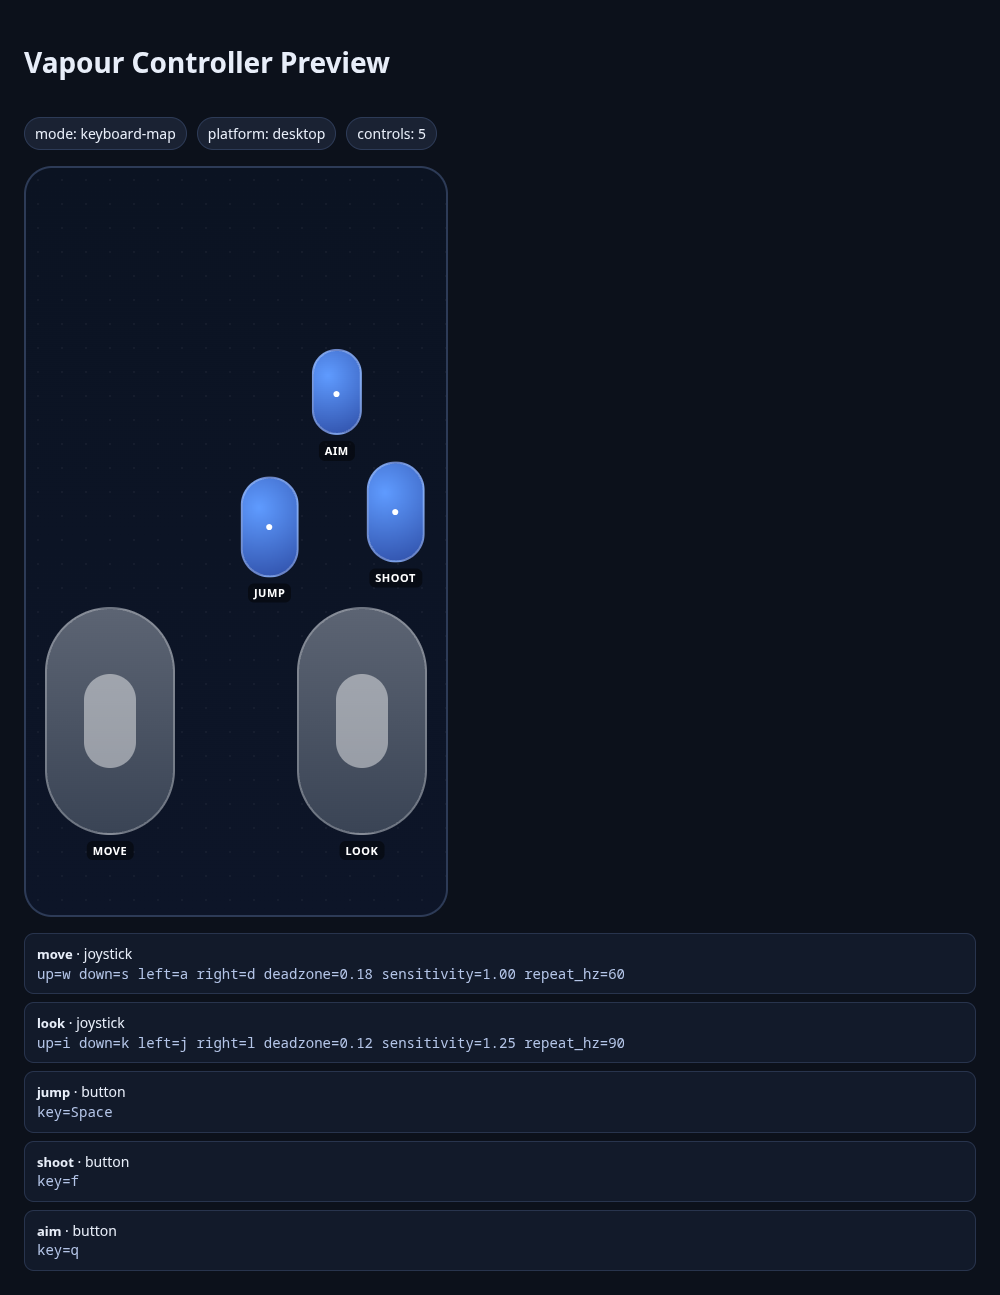
A mistake the preview caught. Our first layout put
jumpaty = 0.58, and the ASCII preview showed it overlapping the look stick (JBJJ). On a phone a thumb could not tell them apart. We moved the buttons up until no two controls touched.
5. Run it locally
vapour test
Testing TPS Demo v0.1.0 at http://127.0.0.1:41873/
FPS overlay on (local test only). Close the game tab for a summary; Ctrl+C to stop.
eBPF profiler attached to the game browser (CPU and memory, browser plus its processes).
Capture started automatically; open the profiler tab to watch it. The profiler session lasts 5 minutes. Close the browser to stop.
The port is chosen for you and differs each run. When you close the game tab, one more line is printed with the frame count, the average FPS, the 1% low and the worst frame time.
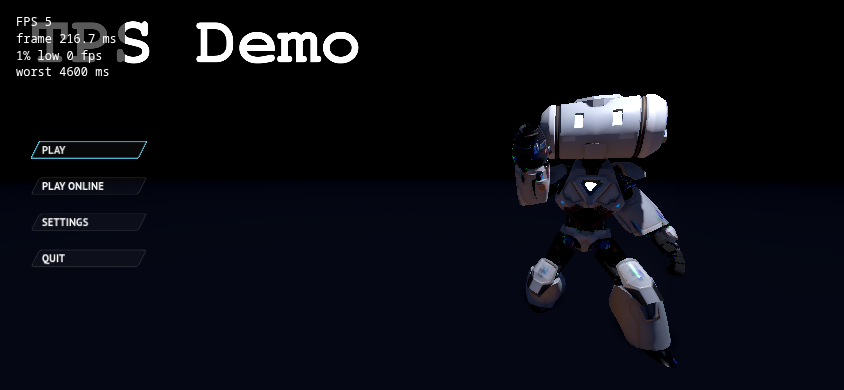
You get a Chromium window with the game and, in a second tab, the profiler. Details of what each shows are in Profile your game locally. Press Play and the real level loads. This is the same build, captured in headless Chromium (software rendering, so it crawls):
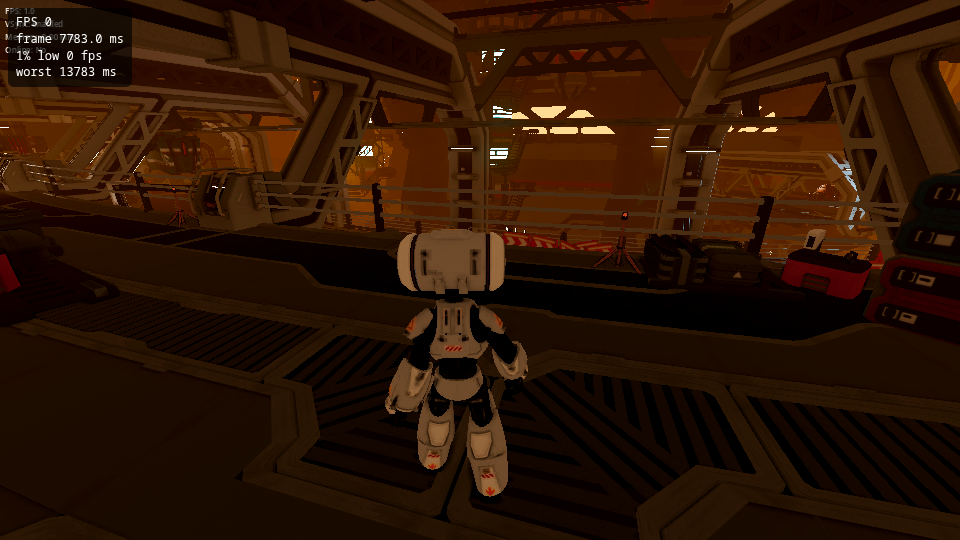
The overlay reports the truth: on software rendering the frame time is 7.8 seconds. On a real GPU it is a different game. The text under the overlay is the game's own debug readout.
In a phone-sized window the menu looks like this (an emulated 844 × 390 phone viewport):
Here is the profiler attached to this exact build while it ran (captured headless, so CPU is high and there is no GPU):
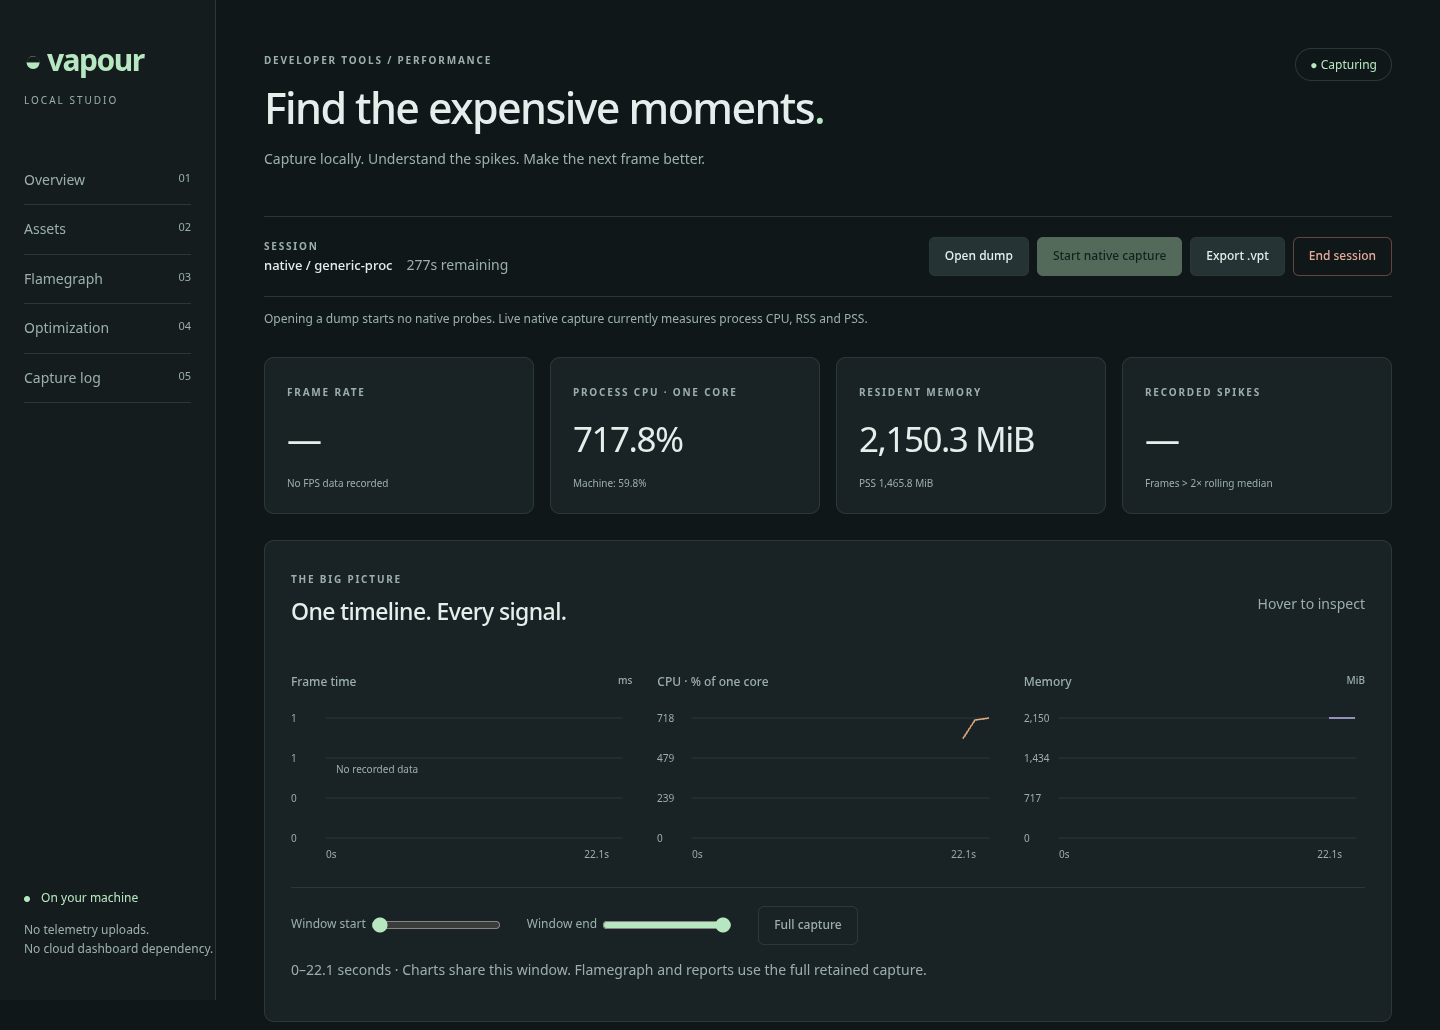
The frame-rate tile reads "No FPS data recorded". That is accurate: the native profiler measures CPU and memory today, and frame data comes from the overlay.
6. CI
Two workflows live in .github/workflows/:
vapour-check.ymlruns on every push and pull request. It exports the Web build in thebarichello/godot-cicontainer and checks thatindex.htmlandindex.wasmexist. It needs no secrets. It passes on the sample repo.vapour-publish.ymlruns when you push a tag such asv0.1.0. It exports the build and publishes withvapour-computer/vapour-ci@v1.
A trap we hit: our first version put the publish step inside the push workflow behind an
if. GitHub resolves an action before it evaluates any step, andvapour-ci@v1is not released yet, so every push failed with "Unable to resolve action". Splitting publish into its own tag-only workflow fixed it.
To publish, add a VAPOUR_TOKEN secret to the repository (create a token) and push a tag.
7. Check the size, then publish
$ vapour publish --dry-run --skip-store
Packed build/web (255.1 MiB) as version 0.1.0
Dry run: nothing uploaded.
The folder is about 600 MB, but it compresses to 255.1 MiB, inside the current 512 MiB upload limit. A game that does not fit would need the planned large-game delivery.
When you are ready:
vapour login --token vpr_...
vapour publish --notes "First tutorial build"
What you learned
- A Web export preset must be named
Web, and must be committed. - On-screen controls can only press keys, so give every action you need a key in the Input Map.
vapour controller previewcatches overlapping controls before a player does.vapour testgives you an FPS overlay and a profiler without changing your build.- Keep the publish step out of workflows that run on every push until
vapour-ciis released.